Before Plex removed the ability to install plug-ins on the server, HelloHue would dim lights and make the room like a cinema. The following is how I achieved the same effect using NodeJS from scratch.
Why didn’t I use openHAB or similar? Short answer, I did try! But the learning curve was a little too much for what I wanted to achieve. I didn’t need a GUI or anything, just something to listen to some events and perform actions.
You will need
- Plex Server with Plex Pass
- Something to run NodeJS on (I spun up an LXC container on my Proxmox hypervisor)
- Philips Hue Bridge
- A player with the Plex app installed
All of these things are run internally on my network over plain text 🙄 but there is nothing stopping you from sending these to an instance somewhere else on the internet (securely, of course).
So, how?
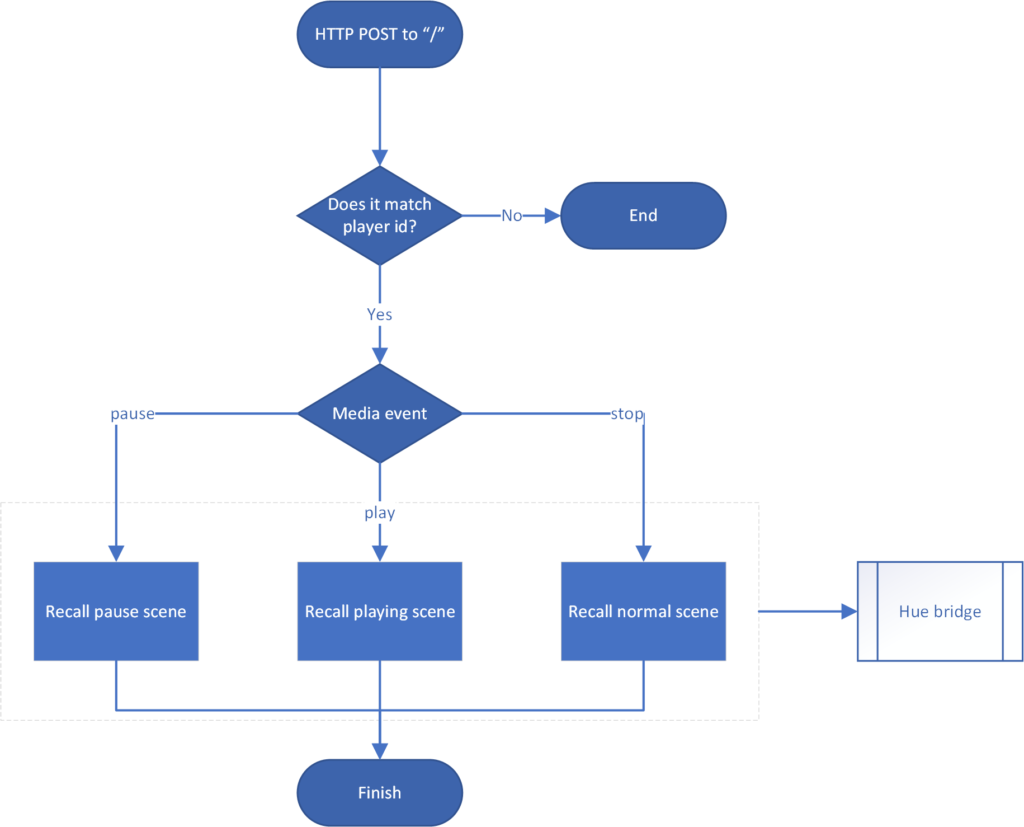
Plex can send webhooks to endpoints you specify whenever media is played/paused/stopped. We need to set up an application to listen to these hooks and respond appropriately by switching the lighting scenes. Below is a quick Visio of a request sent from Plex:

Seems pretty simple, no? For each request we shall check if one of our selected players has performed an action on streaming. If it has, we will send a request to the Hue bridge to start a scene change with some timings.
Set up Plex
Navigate to your plex install and go to /web/index.html#!/settings/webhooks. I recommend getting Plex to send the data to your dev machine first so you can keep debugging code. Once you’ve finished developing, you can transfer it to your server.
Start up Wireshark and start capturing. Then start playing some media. Either in your browser or on your player of choice. You should receive a few packets of HTTP to your specified port . This is a simple HTTP POST request containing some JSON:
In fact, it contains quite a bit of information. Every time the player is paused, played, or stopped, this information gets sent to all webhook endpoints. Our focus here is to consume the event and player.uuid fields and perform actions based on their values.
Enter NodeJS
I have not written much code in recent years. My C# printer dashboard of 2016 is still spinning around at my old workplace as far as I know. I have never touched Node before so this could be seen as a perfect learning opportunity to expand my skillset. The following will assume you have set up NodeJS before and have a way to test/debug. There are a lot of really good tutorials out there so I shall not reinvent the wheel.
The first decision branch is going to check for the player id. I don’t want the Living Room lights changing when my brother is streaming TV shows to his iPad across the country. To find the player.uuid, we can use everybody’s favourite debugging method – console.log(). This will output the received playerID to the console. Press play on some media and you should get something in the terminal.
Keen-eyed viewers will notice that I am checking to two players here. I have a smart TV and a PlayStation on the same display. I wanted the same effect on both players. Within the if statement, we can put some more logic and check the media event:
Start that up on a debugging platform of choice and we should now see some more information about what is happening. This is all well and good, but lets do something with the lights.
The Hue API
There are lots of things you can do with the Hue API. For this project, we are only interested in the group actions to recall scenes we have set up in the app. A really useful tool for testing and debugging is included on the Hue bridge at /debug/clip.html.
Advice
Make sure you generate your token to use the API. Some documentation on how to get one can be found here
Play around with it and get comfortable. Change lights in your room. Change groups of lights. Change them all! Try from the command line with curl or something like postman. Remember that the Hue API is expecting a PUT request for most actions!

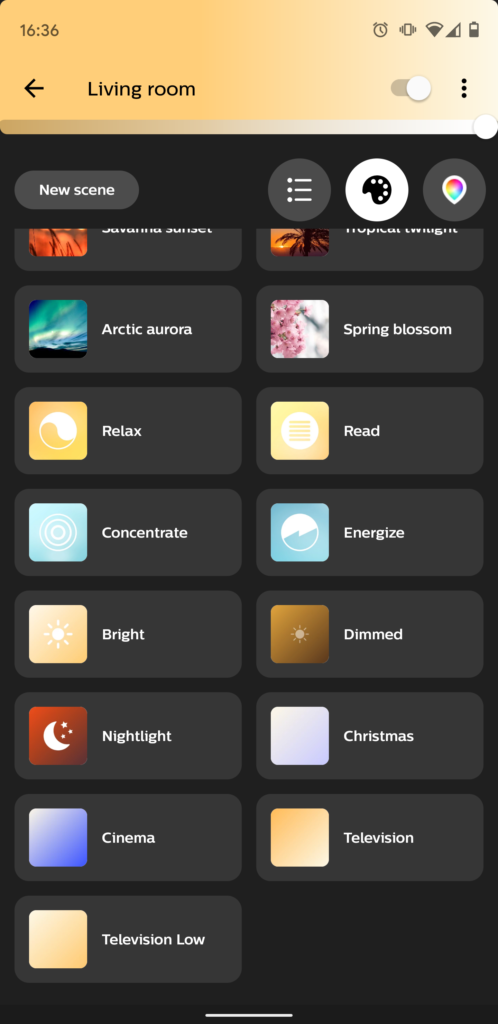
The scenes “Cinema”, “Television” and “Television Low” are what we recall when we receive one of these events. You can obtain the scene id from /api/huetoken/scenes. There is probably a way to do it by name but this is safer. Here is an excerpt from an example response:
Search through the response until you get to the scene where name is one of your scenes in that room. Then copy the 15 character groupId. In this case, mine is 3sVYndbJmRy13j9. I created a function that allows me to pass in the groupId, scene and transitionTime. This means that, for every event, a one liner can recall a set scene.
If you have a debugger attached, you can run your own setScene() functions to test.
So, we have the basics of the code in NodeJS and we have been able to push updates to the bridge from the controller. Let’s put it all together.
The Code
Before you read this, I must warn you: you are looking at my entire NodeJS experience. There is a weird selection of libraries and is probably inefficient. But it works! 😊
There are a couple of bits in this code that have not been mentioned in this article. The recurring job at the end requires the lights to be on to make any changes. We didn’t want the lights to start coming on during the day when playing movies. So the program checks the Hue bridge if any lights are on every 30 seconds and sets a flag to enable the rest of the logic to carry on.
Further Reading
Plex webhooks – https://support.plex.tv/articles/115002267687-webhooks/
Philips Hue API – https://developers.meethue.com/