EVE-NG is an operating system designed to virtualise networks. You can install it on whatever spare machine you have available – although I would recommend something within the last couple of years and with as much RAM as you can get your hands on. I run it on Hyper-V (watch out though – Hyper-V is not officially supported). Have a look at the system requirements for more information. The following is recommended:
- A computer with a decent processor (anything 8th gen intel i5 and up, or the AMD Ryzen 3900 or newer) – it must support VT-x/EPT
- 30GB on an SSD (M.2 preferred)
- 8GB RAM
You will also need:
- An SCP program (WinSCP)
- A VNC viewer (UltraVNC)
- A telnet client (SuperPuTTY)
Step 1 – Download and install EVE-NG
EVE-NG comes in three editions:
- Community
- Professional
- Learning Center
Professional and Learning Center include features such as roles, and lab timers/tasks for testing students. Thankfully, all of the features we will use are part of the free community edition.
There are plenty of instructional videos and walkthroughs available on the web, so head over to the EVE-NG website to get up and running. Either burn the disc and place in your bare-metal, or attach to your hypervisor and install. The installer will run for around 15-20 minutes on slower systems, so leave it going.
Step 2 – Add a VyOS image
VyOS is an open source router and firewall that we will use to create a network. It is easy to pick up if you have experience with equipment from Juniper or Aruba. Head over to the website and download the rolling release. I’m going to base the instructions on the guide available here.
- Using SCP, copy the downloaded ISO to
/opt/unetlab/addons/qemu/vyos-1.3.0-amd64/. You will need to make a new directory (change the version number accordingly). - Rename the iso to
cdrom.iso - Now, SSH into your EVE-NG host and navigate to the directory we just created
- Run
qemu-image create -f qcow2 virtioa.qcow2 2G.This will create an empty HDD of 2GB ready for the VyOS virtual machine.
Keep this SSH session open – we will return to it in a bit.
Step 3 – Log in to EVE-NG
Navigate to the IP address of your EVE-NG instance using a web browser and login. The default username and password is admin/eve. You should be able to see something like the following:

In this example, there is an existing lab, but you should have the option to start a new one just below the search bar. Enter an appropriate name the Name box, and leave the Version as 1. You can fill in the other items here, but they are not necessary. Click Save.
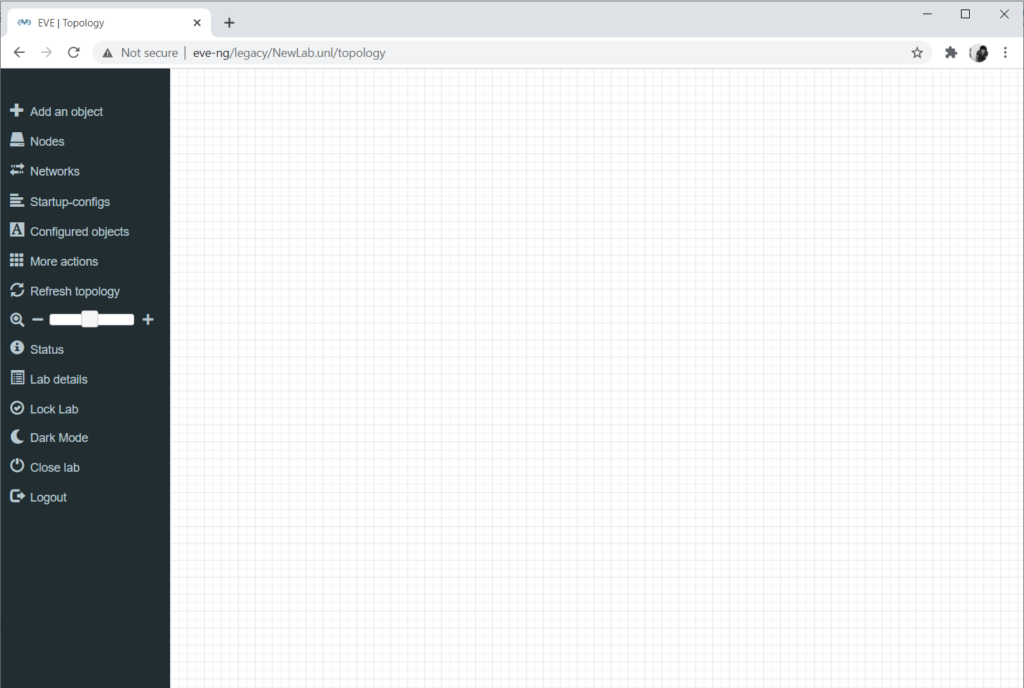
Welcome to the main interface of EVE-NG! Hover over the icons on the left-hand side of the screen to display a few options.
Step 4 – Create the VyOS node
Select Add an object > Node. This will bring up a list of devices you can add to the lab. Find VyOS in the list and click it.
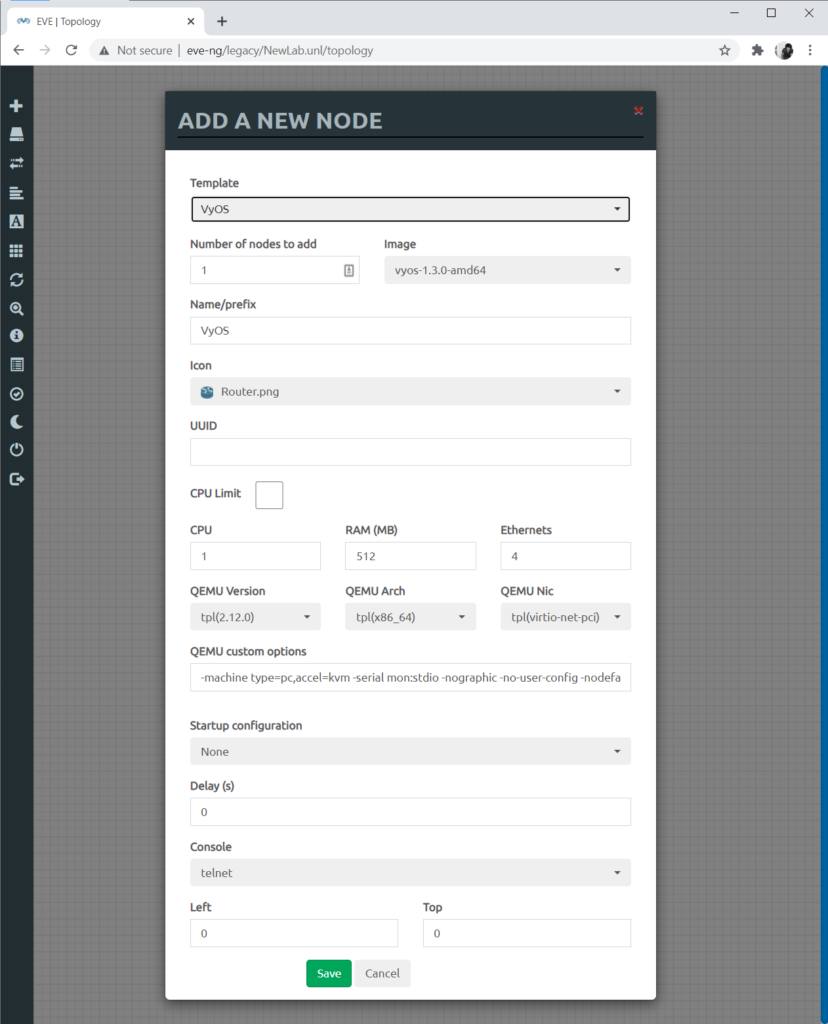
Configure the node by setting RAM and CPU fields. Most of the defaults are fine, but I set machines to 512MB RAM and 4 network interfaces. Click Save.
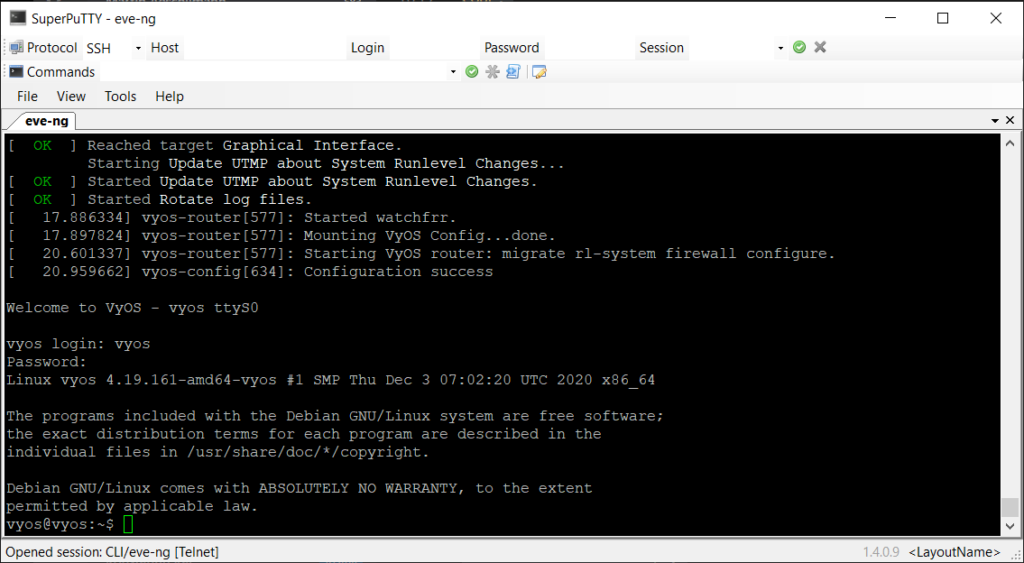
Right-click the new node and click start. Then, click on the node. This should open up a telnet session. If this doesn’t work, hover over the icon and have a look at the URI it points to. Enter that in your telnet client.
Once VyOS has started up, login with the default username and password: vyos/vyos. Run the command install image
Run through the VyOS install process as normal.
Once that is completed, run poweroff to turn off the machine. Your telnet session will disconnect.
Step 5 – Commit the changes back to default
Go back to the SSH session opened previously, and run cd /opt/unetlab/tmp/0/3491e0a7-25f8-46e1-b697-ccb4fc4088a2/1/, where the UUID (the long number) is your lab UUID. Find that by going to the UI and clicking Lab Details. The 1 after that is the node number, which should be 1 as this is the first node in this lab.
Run qemu-img commit virtioa.qcow2. Then, remove the cd rom from the VM by running cd /opt/unetlab/addons/qemu/vyos-1.3.0-amd64/ and then iso: rm cdrom.iso
Make sure the permissions on the files are correct. EVE-NG provides an easy way to do this, just run /opt/unetlab/wrappers/unl_wrapper -a fixpermissions
Next Steps
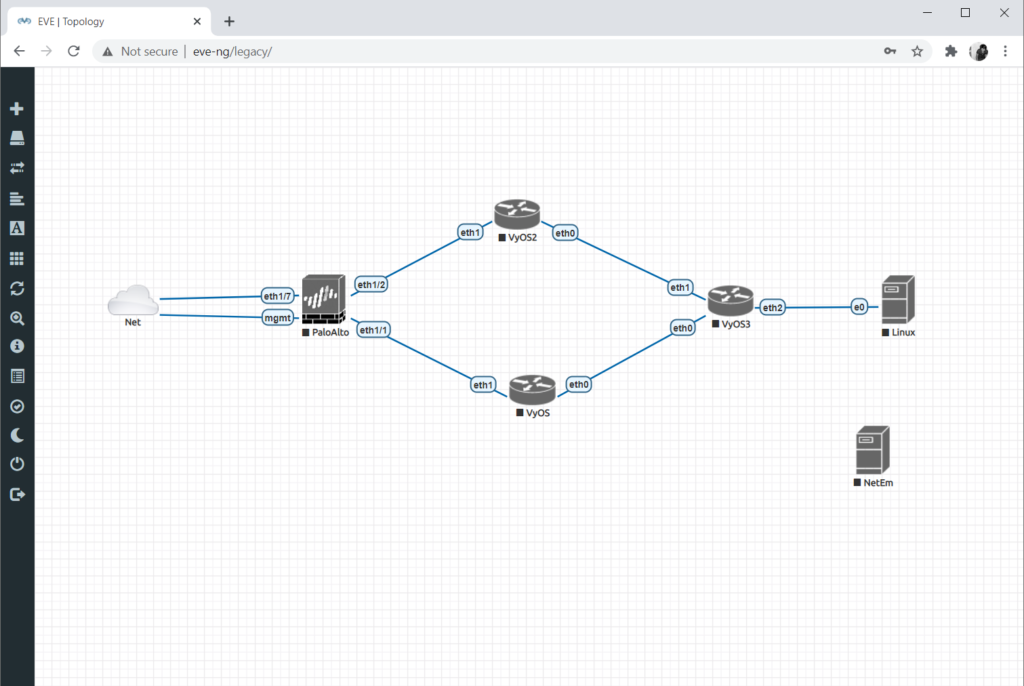
Add another VyOS router to the lab and start it up! Connect with telnet again and you should see a login prompt. Congratulations! You are set up and ready to go.
Next time, we will look at connections and making basic network.